Monday, May 28, 2012

MY favorite quilt

This is MY quilt that I selfishly made for myself.

I adore it to pieces and stole it from the guest bed in my sewing room and have been sleeping with it. After I made it I never took the time to get some pictures of the finished product. So this morning after waking up with it I decided to finally get around to it.

I designed the pattern after I bought a stack of fabric at the closing of a great fabric store. I used the yardage and also a white jelly roll. Funny thing about this quilt is I started the concept and cutting in February 2011 and finished it in February 2012. My skills grew so much in that time period through all the other quilts and sewing projects I finished that the ending product in 2012 was much better than I envisioned in 2011.

See these stacks? This is how the quilt sat for about a year...sad but true

 Than I finally took the time to make it into my favorite quilt....
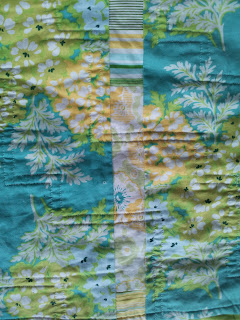
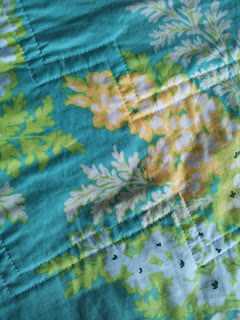
 The backing fabric of this quilt is on of the main reasons I love it. Big vintage flowery design but in more modern colors. The entire quilt is very springy and reminds of a sunny day with a sudden rain shower like we are so accustom too this time of year.
What I am most proud about with this quilt is the actual quilting I did. I did a zig-zag design through the entire quilt which you can kinda see in these pictures.
 To bind this quilt I used the simple fold over technique. I wanted something very thin so that I didn't loose much of the design.
I went slow and steady and ended up with a very nice machine finish on it. Someday I may take the time to learn to hand bind but when I get to this point in the quilt I get so excited I just want it done!

As is with any sort of new quilt or fabric I buy the poodles love it. This photo was taken just minutes after the final touches were done. I was vacuuming up the threads on the floor and lewie claimed it.

Here Lew is posing with the poodle tag....He really does think this one is his I don't have the heart to tell him its really mine.

Thursday, May 24, 2012

Wine Welcome

My front door was white. As white as the trim on my blue house. Nothing special, just a factory white door. In fact, my whole porch area was really boring. Really this porch area had been driving me crazy since we moved in because the original plan was to have a red door (and that didn't happen) and a little different porch entry situation (which also didn't happen thanks to the city's weird rules) Anyway, with the sun shining one morning this spring I decided it was time for a change. With some pinot noir colored paint and some vintage windows I gave it a little pick-me-up which I think has made a ton of difference. Here are the before and after pics!


              BEFORE Pinot Noir                                  AFTER Pinot Noir


BEFORE

AFTER

And now for the vintage windows. I bought these at a little store in Sumner and painted a quick coat of white to make them look a little fresher and Jason screwed them in to hang them up. I decided on windows without old glass panels partly due to our wind and because they were a heck of a lot cheaper!

 All done! (I love before and afters they make me feel like I did so much!)

BEFORE Pinot Noir & vintage windows

AFTER!!!!
Now I just need to find the perfect bench/chairs/swing/something so I can sip iced tea on the front porch with Jason and the poodles!

Wednesday, May 23, 2012

Bible Covers

Whoa! I have been a long time! Been busy with grad school and lots of projects though. Been sewing a lot, updating the house, celebrating new marriages and of course doing a lot of grad school work. Less about the grad school though and more about the projects. I started off this year by working a personalized Bible covers for each kid in my Sunday school class.

 This project took an unexpected turn when just as I was finishing my last few we found out that the Bibles we had been planning on ordering were no longer available. The problem with this was a size change in the covers with the new ordered ones making it so I had to go back through and adjust each cover individually. In the end I all got done and the best part is the covers are adorable and on the Bibles of all the kids in class!

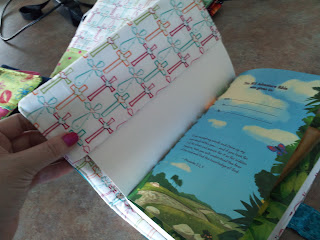
This is the inside of the cross cover. Put some different fabrics on the inside to personalize them all for the kids.


Inside flaps hold the book in place. I love that cross fabric!

This one was for the class cougar fan.


All unique and fun. I am very happy with how this project came out and even more excited that the kids actually have been using them! I created the pattern using a few examples I saw online. The softcover of the Bibles was a bit of a challenge but lining the covers with batting seemed to be enough with strong seems.

Anyway, trying to catch up on my project posting. More to come tomorrow!

Follow Me on Pinterest